How to Restore a Wooden Cutting Board: Best Easy Guide 2026
Learning how to restore a wooden cutting board saves you money and keeps your kitchen safe. A worn-out wooden cutting board doesn’t belong in the trash. With the right techniques, you can restore a wooden cutting board to its original beauty and make it food-safe again. Whether your board has deep knife marks, stubborn stains, or hairline cracks, this comprehensive cutting board restoration guide will walk you through every step—from sanding and crack repair to final oiling and buffing. Follow this expert refinishing method and extend your board’s life by 10+ years.
Table of Contents
-
If you’re restoring a full countertop instead of a cutting board, the process is similar but requires an orbital sander. Full steps in our countertop care guide.
- 5 Signs Your Cutting Board Needs Restoration
- Tools and Materials You’ll Need
- Step 1: Assess the Damage
- Step 2: Deep Clean and Disinfect
- Step 3: Sand the Surface to Restore a Wooden Cutting Board
- Step 4: Fix Cracks and Splits
- Step 5: Apply Food-Safe Oil When You Restore a Wooden Cutting Board
- Step 6: Buff and Final Polish
- Before and After: What to Expect
- Maintenance Tips to Avoid Future Damage
- Frequently Asked Questions
5 Signs Your Cutting Board Needs Restoration
Before you start refinishing your cutting board, confirm it actually needs restoration—not just a quick cleaning. Here are the telltale signs you need to restore a wooden cutting board:
- Deep knife grooves that trap food particles and bacteria (deeper than 1/16 inch).
- Visible cracks or splits in the wood, especially along the grain or glue lines.
- Persistent stains from wine, berries, turmeric, or blood that survive regular washing.
- Dry, gray, or faded appearance instead of rich wood color—signs the board is dehydrated.
- Rough, splintered surface that feels fuzzy or catches on a damp cloth.
If your board only has surface dirt and mild odors, start with our complete cleaning guide first. Restoration is for boards that have structural or deep cosmetic damage. For regular upkeep, learn how to season a wooden cutting board monthly to prevent future damage.
If your board only has surface dirt and mild odors, start with our complete cleaning guide first. Restoration is for boards that have structural or deep cosmetic damage. For regular upkeep, learn how to season a wooden cutting board monthly to prevent future damage.
Tools and Materials You’ll Need to Restore a Wooden Cutting Board
Gather these supplies before you begin. Using the wrong materials can ruin your board or make it unsafe for food contact:
- Sandpaper: 80-grit, 120-grit, 220-grit, and 320-grit (wet/dry silicone carbide preferred).
- Sanding block or orbital sander: A random orbital sander saves time on large boards; hand-sanding gives more control for end-grain boards.
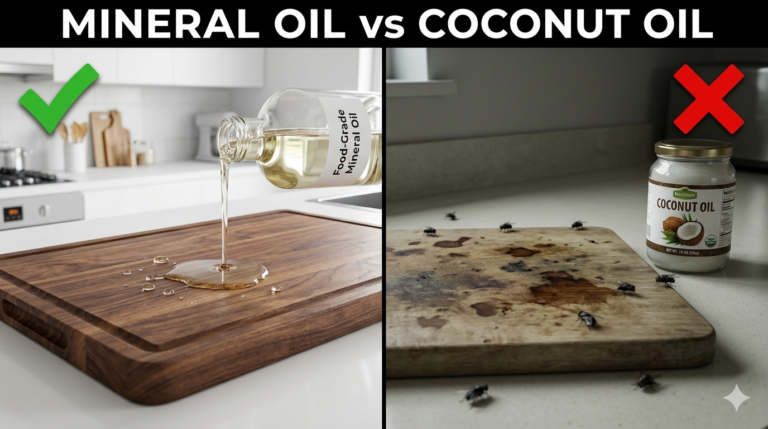
- Food-grade mineral oil: The gold standard for cutting board restoration. Look for “USP” or “food-safe” labels. See our best oils for cutting boards comparison.
- Beeswax and mineral oil blend (board butter): For the final protective seal.
- Clean lint-free cloths or paper towels: Microfiber works best for oiling.
- Wood glue (Titebond III or similar food-safe waterproof glue): Only if repairing cracks. Titebond III is FDA approved for indirect food contact.
- Bar clamps or pipe clamps: For holding cracked boards together while glue dries.
- White vinegar (5%): For pre-restoration disinfection.
- Tack cloth: To remove all sanding dust before oiling.
Step 1: Assess the Damage
Place your board on a flat, well-lit surface. Run your fingers across the top to feel for damage before you restore a wooden cutting board:
- Surface-level damage: Scratches, stains, and minor roughness (fixed with sanding only).
- Structural damage: Cracks wider than a credit card edge, loose joints, or warping greater than ¼ inch.
Take a “before” photo. Not only is this satisfying for comparison later, but it helps you track which areas need the most attention during sanding.
Step 2: Deep Clean and Disinfect
You cannot sand a dirty board—the grit will push food particles and bacteria deeper into the wood. Start with a deep clean:
- Scrape the surface: Use a bench scraper to remove any dried food or raised fibers.
- Wash with hot soapy water: Use mild dish soap and the hottest water your hands can handle. Scrub with the grain using a nylon brush.
- Disinfect with vinegar: Spray undiluted white vinegar across the entire surface and let it sit for 10 minutes. According to the FDA Safe Food Handling Guidelines, vinegar is effective against common kitchen pathogens like Salmonella and E. coli on wood surfaces.
- Rinse and dry completely: Rinse with hot water, towel-dry immediately, then let the board stand upright for 4–6 hours until 100% dry. Never sand damp wood—moisture will clog sandpaper and leave swirl marks.
For detailed daily and weekly cleaning routines, see our guide on how to clean a wooden cutting board properly.
Step 3: Sand the Surface to Restore a Wooden Cutting Board
Sanding is the core of any cutting board refinishing project. It removes the top layer of damaged wood, smooths out knife grooves, and prepares the surface to absorb oil evenly when you restore a wooden cutting board.

The Correct Sanding Sequence
- 80-grit (rough sanding): Attach 80-grit paper to your sander. Move with the grain in slow, overlapping passes. This aggressive grit removes deep stains and levels uneven surfaces. Don’t press down hard—let the sander do the work. Sand until the worst damage is gone.
- 120-grit (medium smoothing): Switch to 120-grit. This removes the deep scratches left by 80-grit. You should see the wood color becoming more uniform. Spend 3–5 minutes on this stage for an average-sized board.
- 220-grit (fine smoothing): Use 220-grit to create a silky surface. At this stage, the board should feel smooth to the touch with no visible scratch patterns from coarser grits.
- 320-grit (final finish): Optional but recommended for end-grain boards. This extra-fine grit closes the pores slightly and gives a furniture-quality finish.
Clean between grits: Use a tack cloth or vacuum with a brush attachment to remove all dust. Leftover grit from coarse sandpaper will create scratches when you move to finer paper.
Step 4: Fix Cracks and Splits
If your board has cracks, address them after initial sanding but before final oiling. Sanding first reveals the true depth of the damage.

How to Repair Small Cracks (Under 1/8 inch)
- Widen the crack slightly: Use a toothpick or thin putty knife to open the crack enough for glue penetration. Counterintuitive, but necessary.
- Apply food-safe wood glue: Use a toothpick to work Titebond III (waterproof and FDA-approved for indirect food contact) deep into the crack.
- Clamp tightly: Apply even pressure with bar clamps. Wipe away excess glue immediately with a damp cloth—dried glue won’t absorb oil and will leave pale spots.
- Let it cure: Leave clamps on for 24 hours. Do not rush this step.
- Sand the repair flush: After removing clamps, sand the repaired area with 220-grit until perfectly smooth and level with the surrounding surface.
How to Repair Large Cracks or Warping
For cracks wider than 1/8 inch or boards warped more than ¼ inch:
- Soak the board in mineral oil for 48 hours (submerge completely if possible). This can sometimes reverse minor warping by rehydrating the wood evenly.
- For severe warping, place the board on a flat surface, cover the concave side with damp towels, and apply gentle heat. Monitor closely to prevent cracking.
- If the board is glued-up strips and the joint has failed completely, disassemble, re-glue with fresh adhesive, and clamp for 48 hours.
Step 5: Apply Food-Safe Oil When You Restore a Wooden Cutting Board
Bare wood will crack without oil. This step is identical to seasoning a new board and critical when you restore a wooden cutting board.

The 3-Coat Oil Method
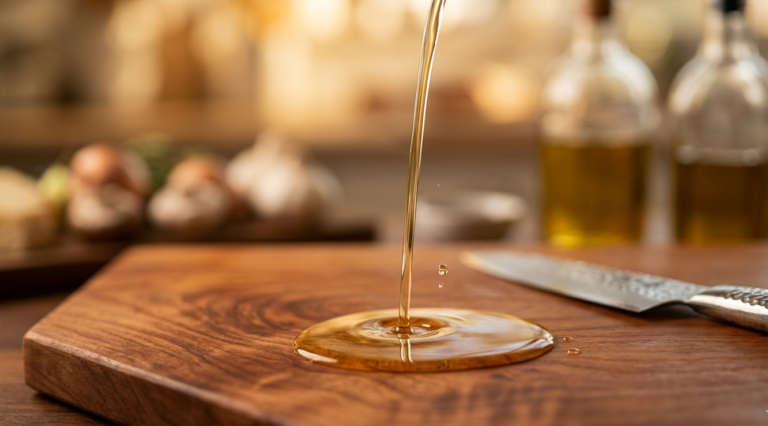
- First coat (heavy saturation): Pour 2–3 tablespoons of food-grade mineral oil onto the board. Spread it with a clean cloth, working against the grain first to open the pores, then with the grain to distribute evenly. Cover all six sides: top, bottom, and all four edges. Let it soak for 6–12 hours (overnight is ideal).
- Second coat (medium saturation): After the first coat has fully absorbed, apply a second lighter coat. You should see less absorption this time. Let it sit for 4–6 hours.
- Third coat (light top-up): Apply a thin final coat and let it sit for 1 hour. Then wipe off all excess oil with a dry cloth. The surface should feel satin-smooth, not greasy.
For a detailed breakdown of which oils are safe and which to avoid, read our dedicated guide on how to oil a wooden cutting board the right way. After restoring, proper maintenance prevents future damage. Read our guide on how to season a wooden cutting board monthly to keep it protected.
Optional: Apply Board Butter (Beeswax Finish)
For ultimate protection, especially on end-grain boards, apply a thin layer of board butter (a 1:4 ratio of beeswax to mineral oil, melted together and cooled). This creates a water-repellent barrier:
- Warm a small amount of board butter in your hands until soft.
- Apply a paper-thin layer across the entire surface.
- Let it sit for 15–20 minutes.
- Buff vigorously with a clean cloth until the surface shines and feels completely dry.
Step 6: Buff and Final Polish
The final step separates amateur restoration from professional results:
- Buff with a clean microfiber cloth: Rub the entire surface in circular motions for 2–3 minutes. This heat-friction helps the oil polymerize slightly on the surface.
- Check for tackiness: If the board feels sticky after 24 hours, you used too much oil or didn’t wipe off enough excess. Sand lightly with 320-grit and re-wipe.
- Let it cure: Wait 48–72 hours before using the board for food prep. This allows the oil to fully oxidize and stabilize inside the wood fibers.
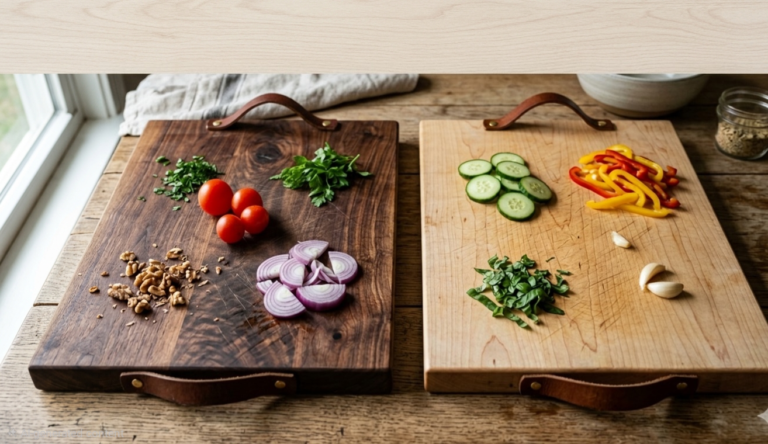
Before and After: What to Expect
A properly restored cutting board should look dramatically different. Here’s what successful wooden cutting board restoration achieves:

| Feature | Before Restoration | After Restoration |
|---|---|---|
| Surface Texture | Rough, fuzzy, deep grooves | Glass-smooth, no splinters |
| Color | Gray, faded, dry-looking | Rich, warm wood tones |
| Water Resistance | Absorbs immediately | Beads up and rolls off |
| Bacteria Risk | High (trapped in cracks) | Minimal (sealed surface) |
| Lifespan | 6–12 months before failure | 10–20+ years with maintenance |
Maintenance Tips to Avoid Future Damage After You Restore a Wooden Cutting Board
Now you know exactly how to restore a wooden cutting board. Keep it looking new with these tips:
Daily Habits
- Wash immediately after use with hot water and mild soap. Never let food dry on the surface.
- Dry with a towel immediately—don’t let it air-dry while laying flat.
- Store upright on its edge, never stacked flat against another board.
Weekly Habits
- Deep clean with the lemon and salt method to pull out surface odors and light stains.
- Inspect for new knife marks. If grooves are getting deep, rotate which side you cut on.
Monthly Habits
- Perform the water test. If water stops beading, apply a fresh coat of mineral oil.
- Apply a thin layer of board butter for extra protection, especially in dry winter months.
Annual Habits
- Do a light sanding with 220-grit to refresh the surface and remove shallow knife marks before they become deep grooves.
- Re-season the board following our complete seasoning guide to rebuild the protective oil barrier from scratch.
Frequently Asked Questions About Cutting Board Restoration
Can I restore a cutting board that has been left outside?
If the board was outside for less than a week and shows no mold, yes. Sand aggressively with 80-grit to remove the weathered gray layer (oxidized lignin), then follow the full restoration process. If the board has been rained on repeatedly and the glue joints are swelling or separating, the structural integrity is compromised—replace it.
How many times can you sand and restore a cutting board?
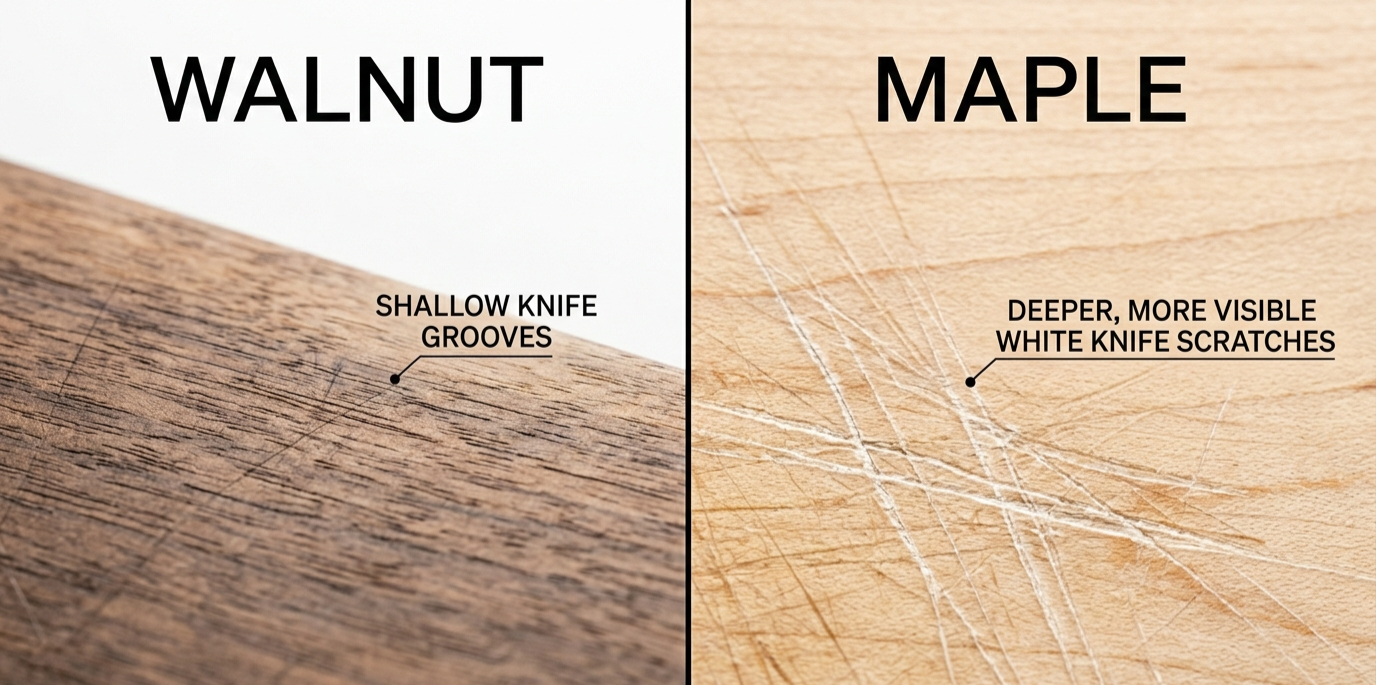
Most hardwood cutting boards (maple, walnut, cherry) can withstand 3–5 full restorations over their lifetime, depending on original thickness. A standard 1.5-inch board loses approximately 1/16 inch of material per restoration. End-grain boards can be restored more times than edge-grain.
Is it cheaper to restore or replace a wooden cutting board?
For boards costing $40–$150, restoration is almost always cheaper. The materials (sandpaper, mineral oil, glue) cost under $15 total. However, if the board is a cheap $15 bamboo board from a big-box store, replacement makes more sense—bamboo is grass, not wood, and doesn’t sand or absorb oil as effectively as hardwood.
Can I use coconut oil or olive oil to restore my cutting board?
Absolutely not. Cooking oils contain triglycerides that oxidize and go rancid within 2–3 weeks. This creates a sticky, smelly surface that harbors bacteria. Only use food-grade mineral oil or specialized cutting board oils. For the full science on safe vs. unsafe oils, see our guide on how to oil a wooden cutting board.
How long after restoration can I use my cutting board?
Wait a minimum of 48 hours after the final oiling before food contact. This allows the mineral oil to fully saturate the wood fibers and the surface to lose any tackiness. If you applied board butter, 24 hours is usually sufficient since the wax creates a harder barrier.
Why does my restored board look darker than when it was new?
Oiling darkens wood by filling the air spaces in the pores with a liquid that has a higher refractive index. This is normal and desirable—it means the wood is protected. Over time (2–3 weeks of use and washing), the color will lighten slightly but will remain richer than the dry, pre-restoration gray.
Related Guides from WoodStuffHQ
- 🧽 How to Clean a Wooden Cutting Board: Deep Clean Guide 2026 — Master the lemon + salt method and daily cleaning routines.
- 🛢️ How to Oil a Wooden Cutting Board: Step-by-Step Guide — Learn which oils are safe, how often to apply, and the 5-step oiling method.
- ✨ How to Season a Wooden Cutting Board — Build and maintain the protective barrier that prevents cracks and warping.
- 🔪 Best Oil for Cutting Boards: Food-Safe Options Compared — Mineral oil vs beeswax vs specialty blends.
External Sources & References
- 📋 FDA Safe Food Handling Guidelines — Official government recommendations for cleaning and sanitizing wooden food-contact surfaces.
- 🔬 NIH Study: Antibacterial Effects of Wood — Peer-reviewed research confirming wood’s natural antimicrobial properties compared to plastic.
- 🌡️ USDA Food Safety and Inspection Service — Best practices for sanitizing cutting boards after contact with raw meat and poultry.
- 🛠️ Titebond III Wood Glue Specifications — FDA approved for indirect food contact applications.